
One thing that I’ve realized about myself is that I often feel the need to be surrounded by environments that ignite inspiration. If a few days go by without anything stimulating me creatively, I feel a need to seek it.
Those environments can be many things; seasons, cafés, nature, old homes and even images on the internet (hello, Pinterest!) or magazines. But I find that window shopping in physical shops is another big source of inspiration for me, and that’s how I was motivated to make this blog post.
On a recent visit to V de V Maison, I noticed a bunch of pressed flower frames which I’ve seen around for a while and have always wanted to try my hand at it. When I picked up one of the frames and inspected it closer, I thought to myself: “I could totally make this”. On my way home and the days following that visit, I kept my eye out for flowers that I could experiment with to re-create what I saw in that charming little store.
I have to say that this is actually the easiest DIY I’ve posted on here. It’s pretty much a 2 step process. It was so quick and easy that after I completed framing my flowers, I wish I had more to do. So below are my super easy steps on how to create your own framed pressed flowers. They’re a perfect addition to walls, windows, shelves or a uniquely personal gift, especially if you happen to know your receiver’s favourite flower.
How to Preserve
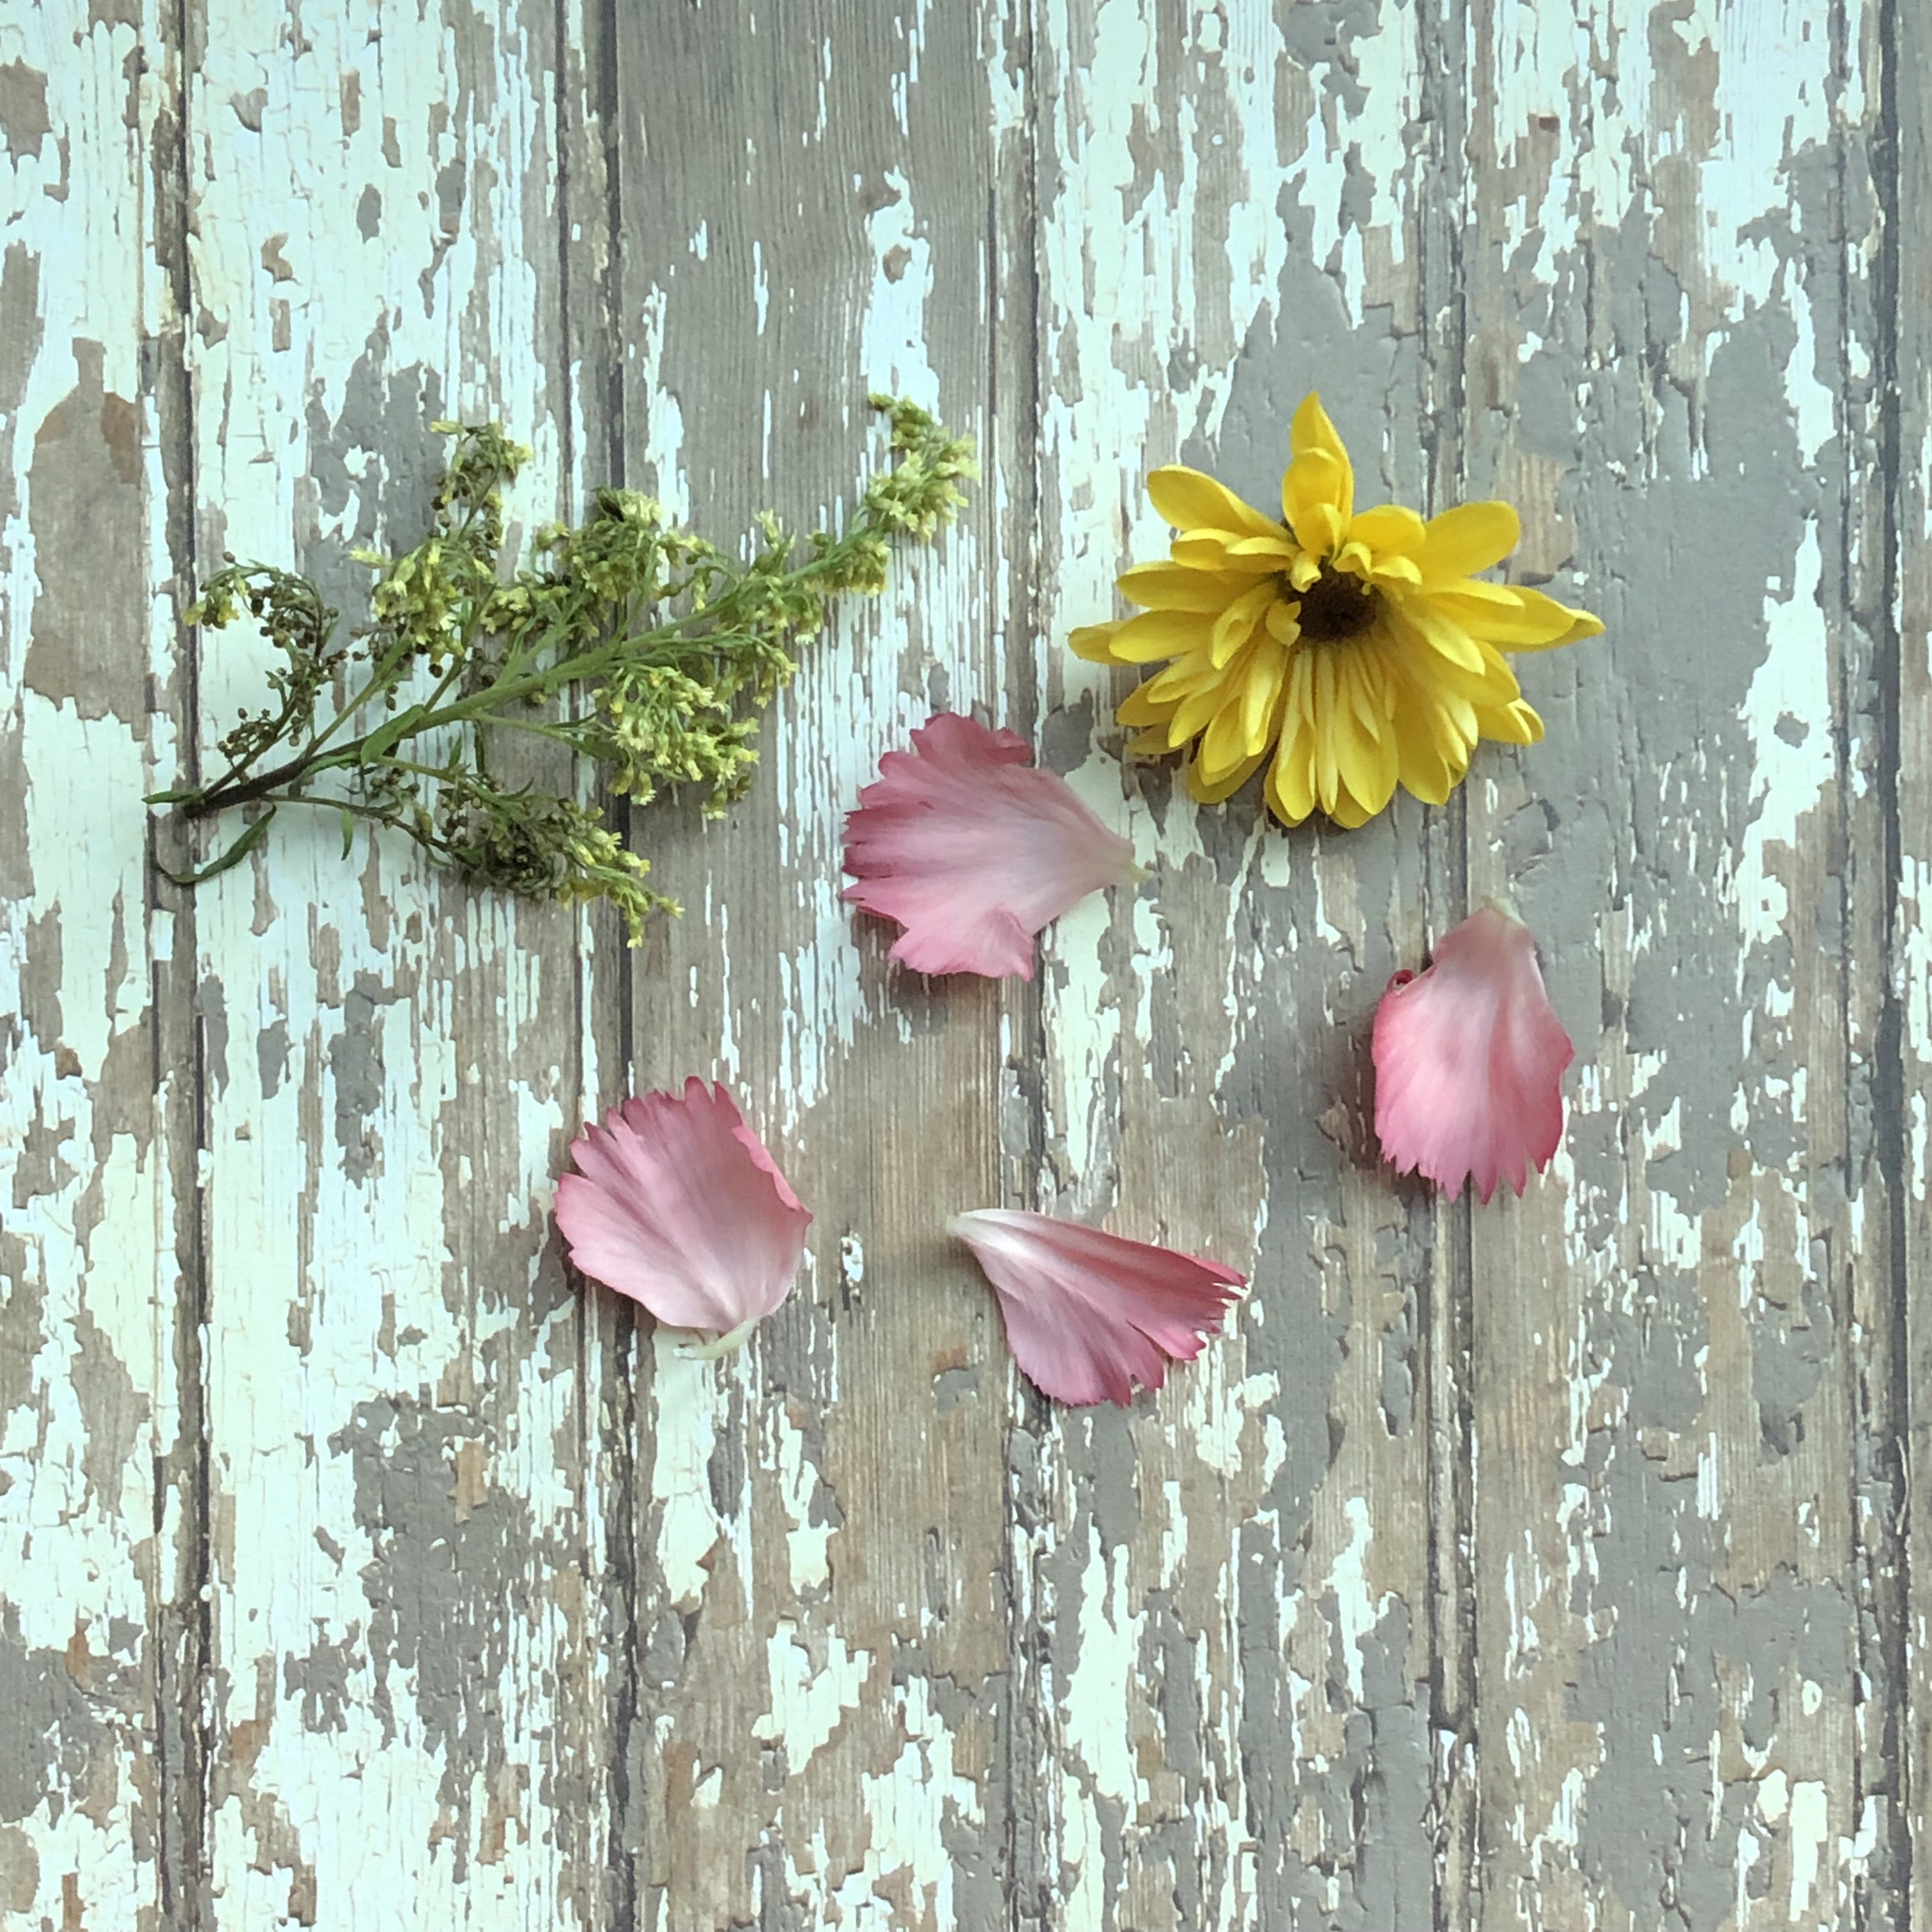
1) Hand pick flowers, leaves or sprigs of greenery that you want to preserve. You can choose from a bouquet you have at home or just wild flowers in a park, garden, etc. Make sure they are bug-free and mold-free.

2) The flatter the flower, the better. Bulkier flowers like roses would just get crushed, however you could pluck the petals to preserve.
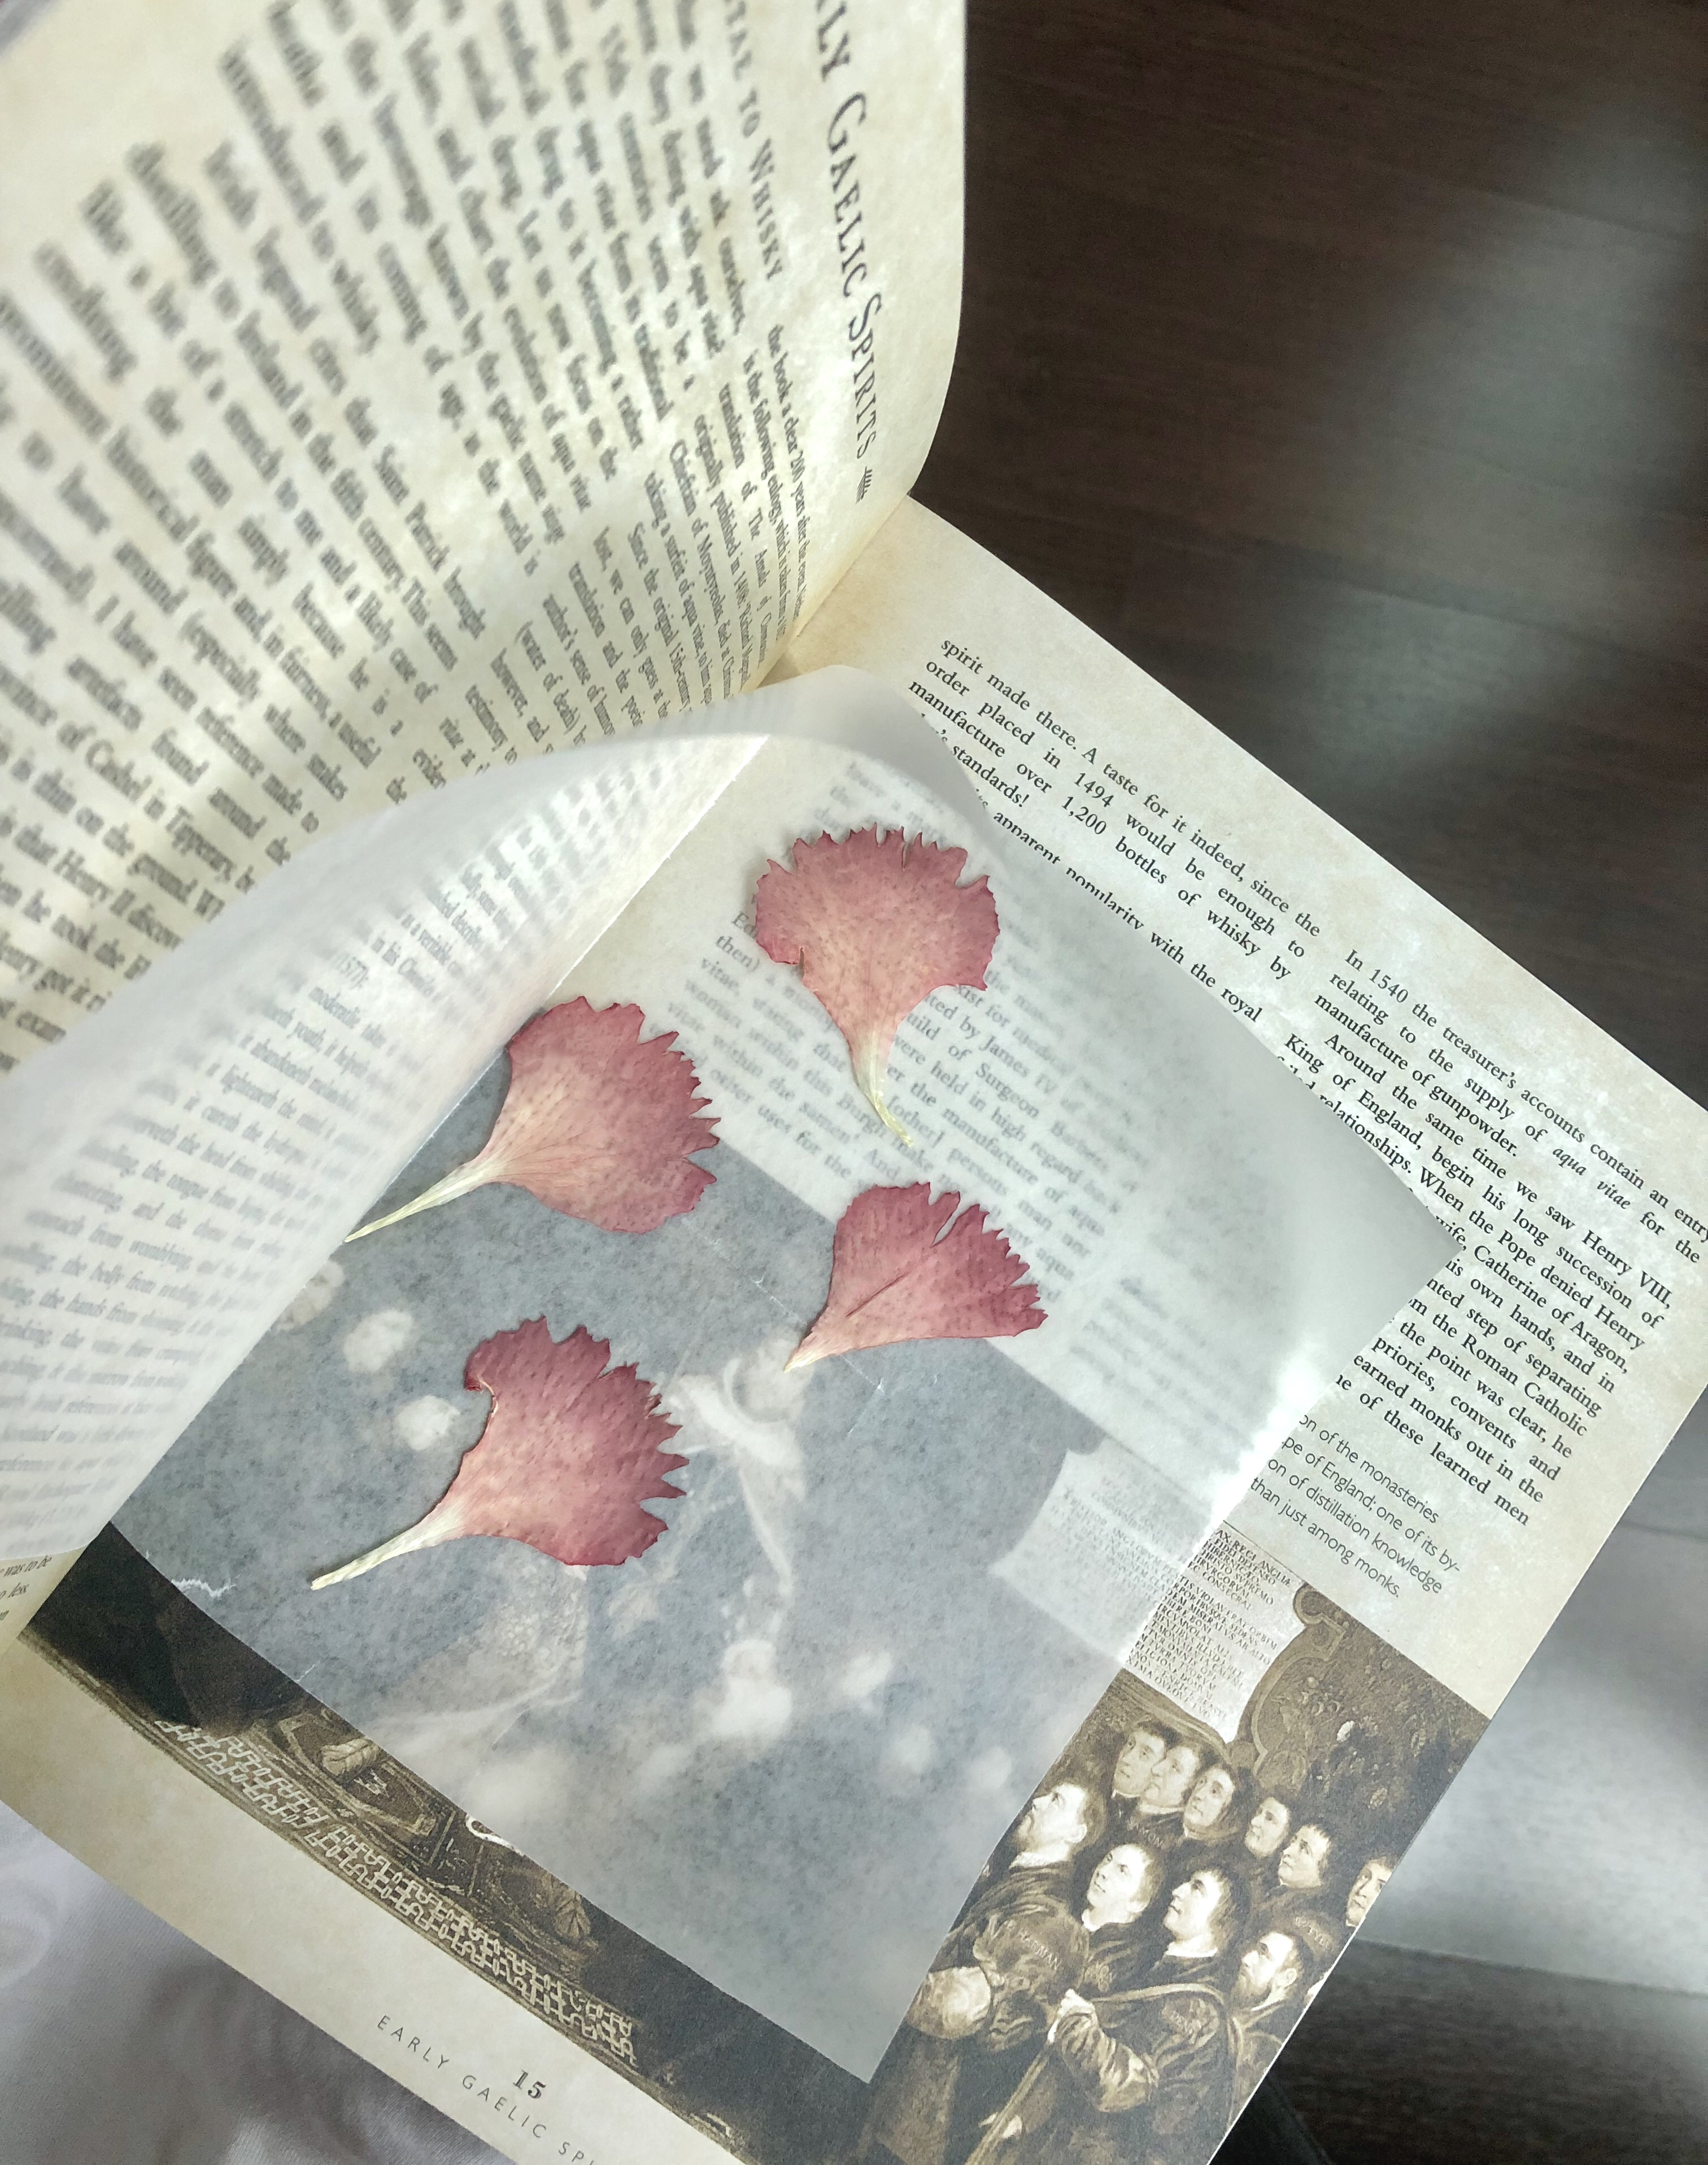
3) Carefully place your flowers in between folded parchment paper, and place that in between the pages of a heavy book.
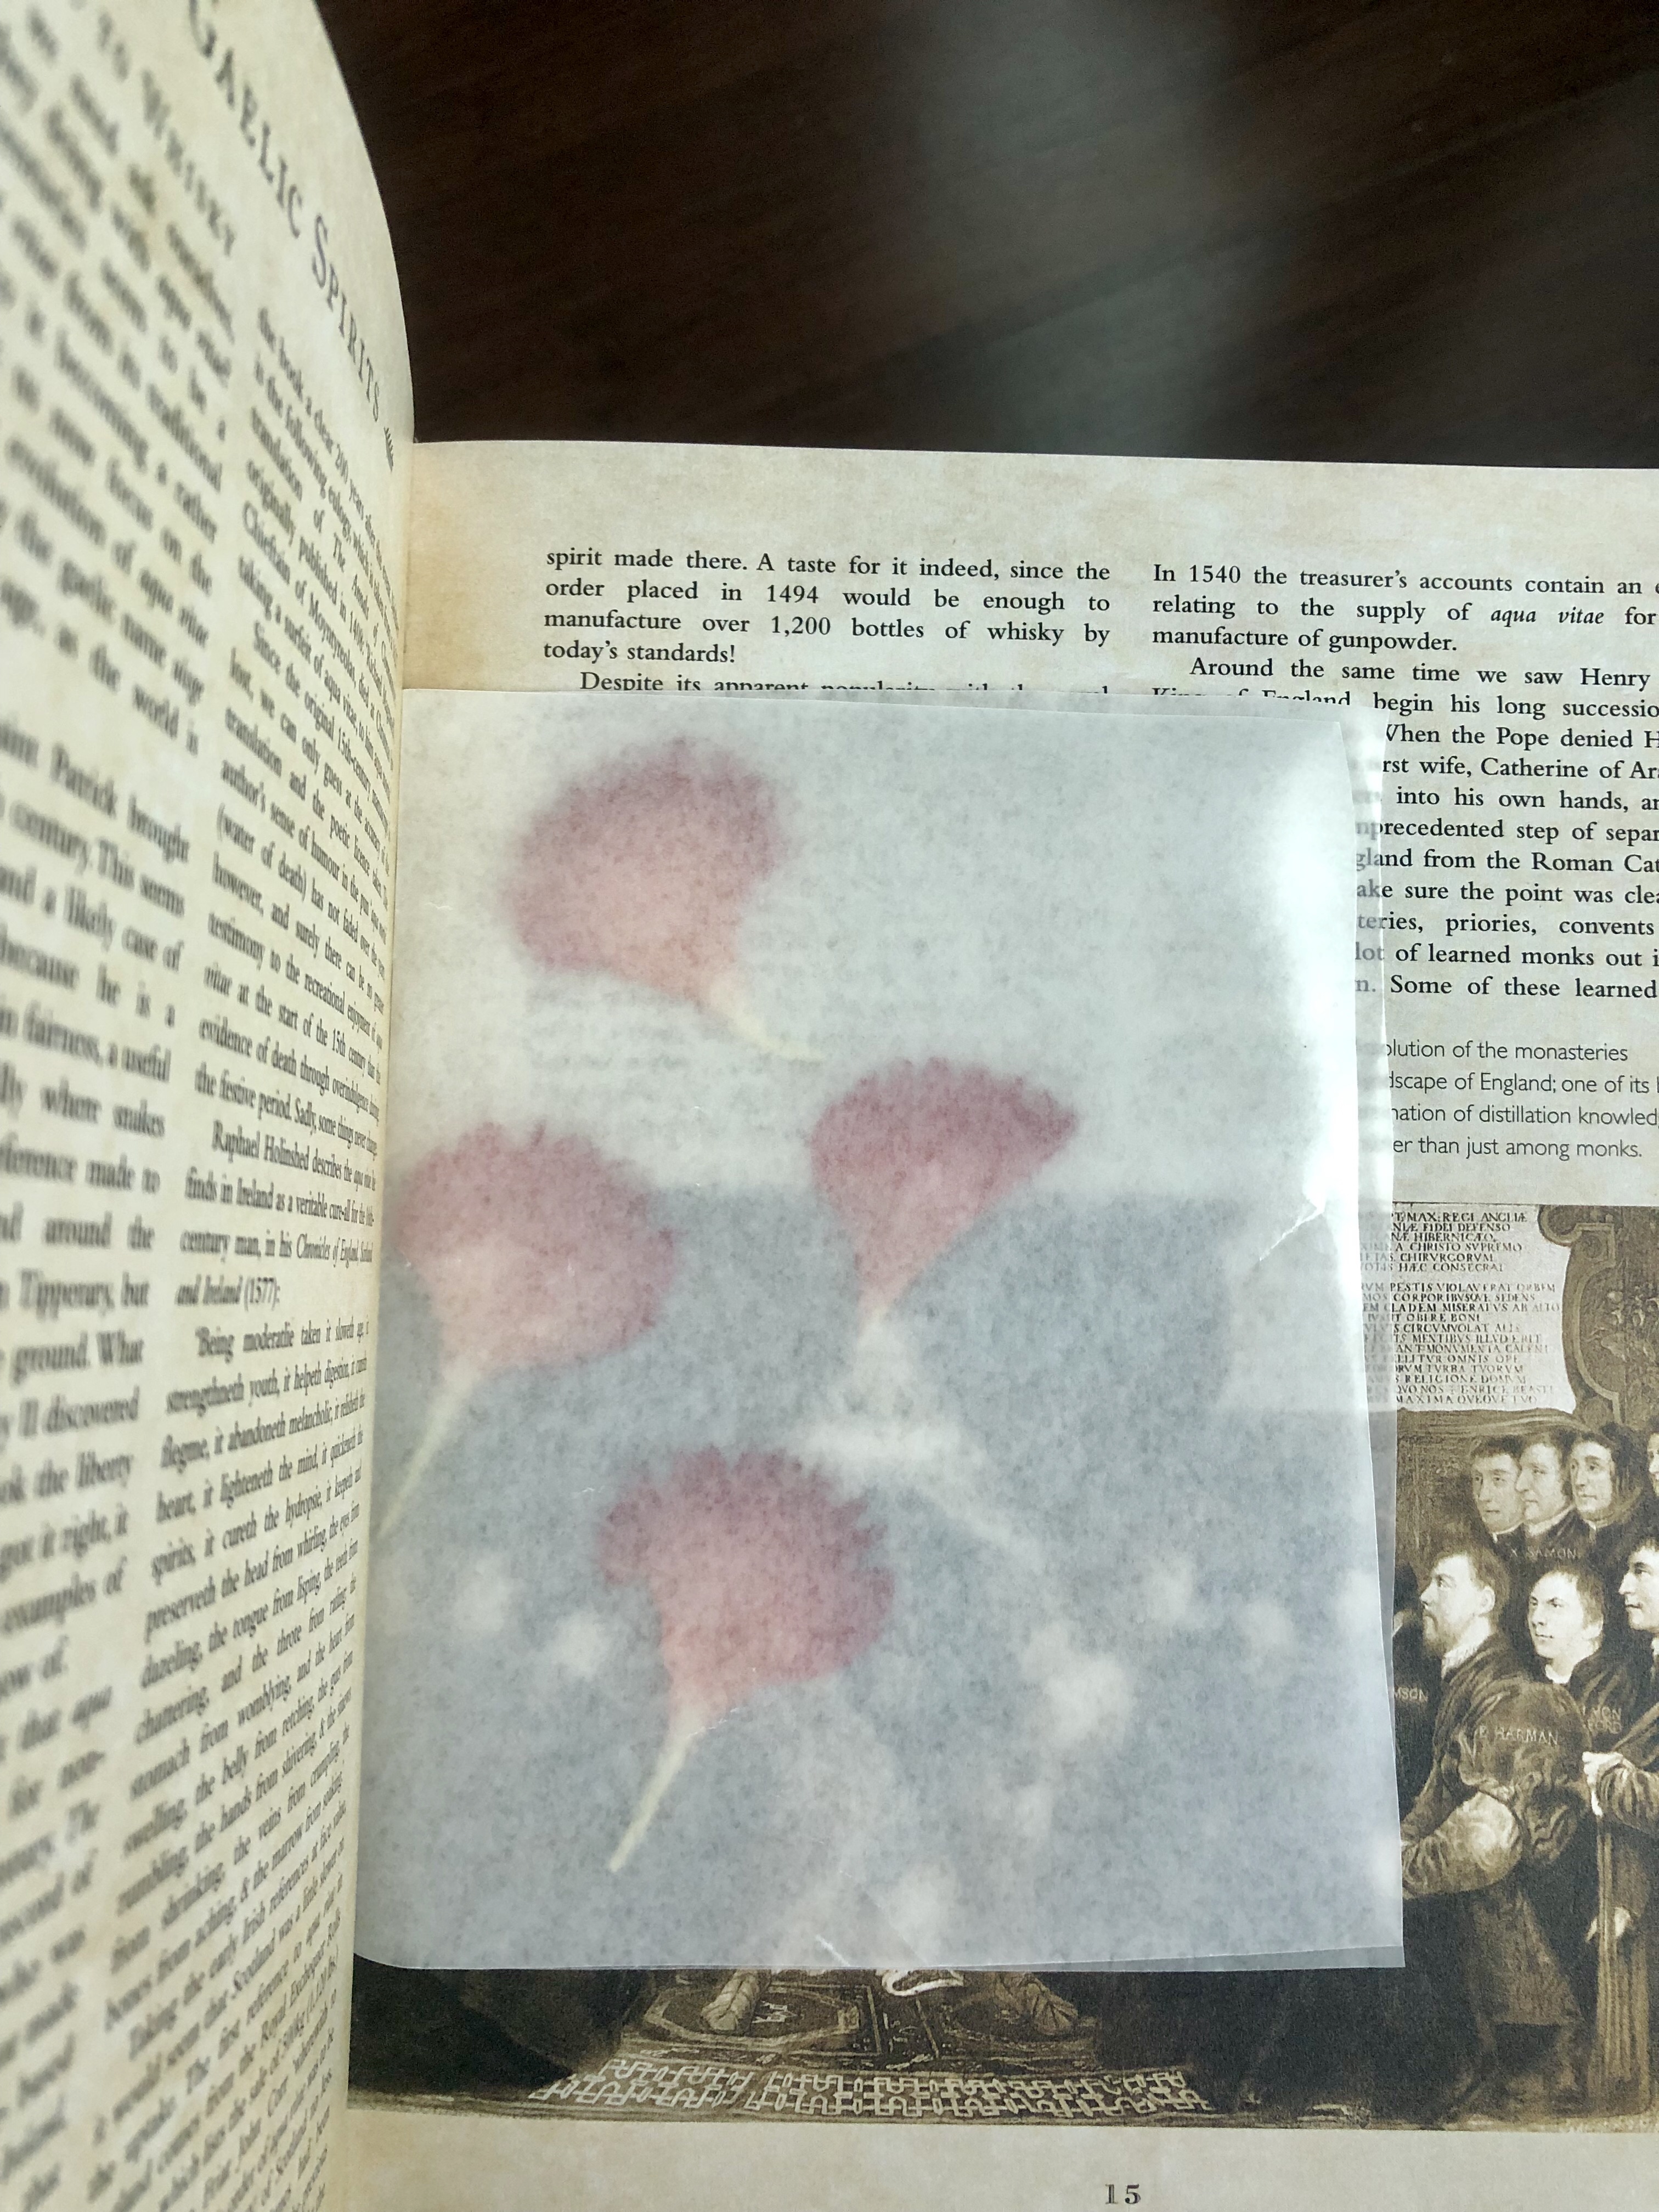
4) Leave in between books for at least 5-7 days.
How to Frame
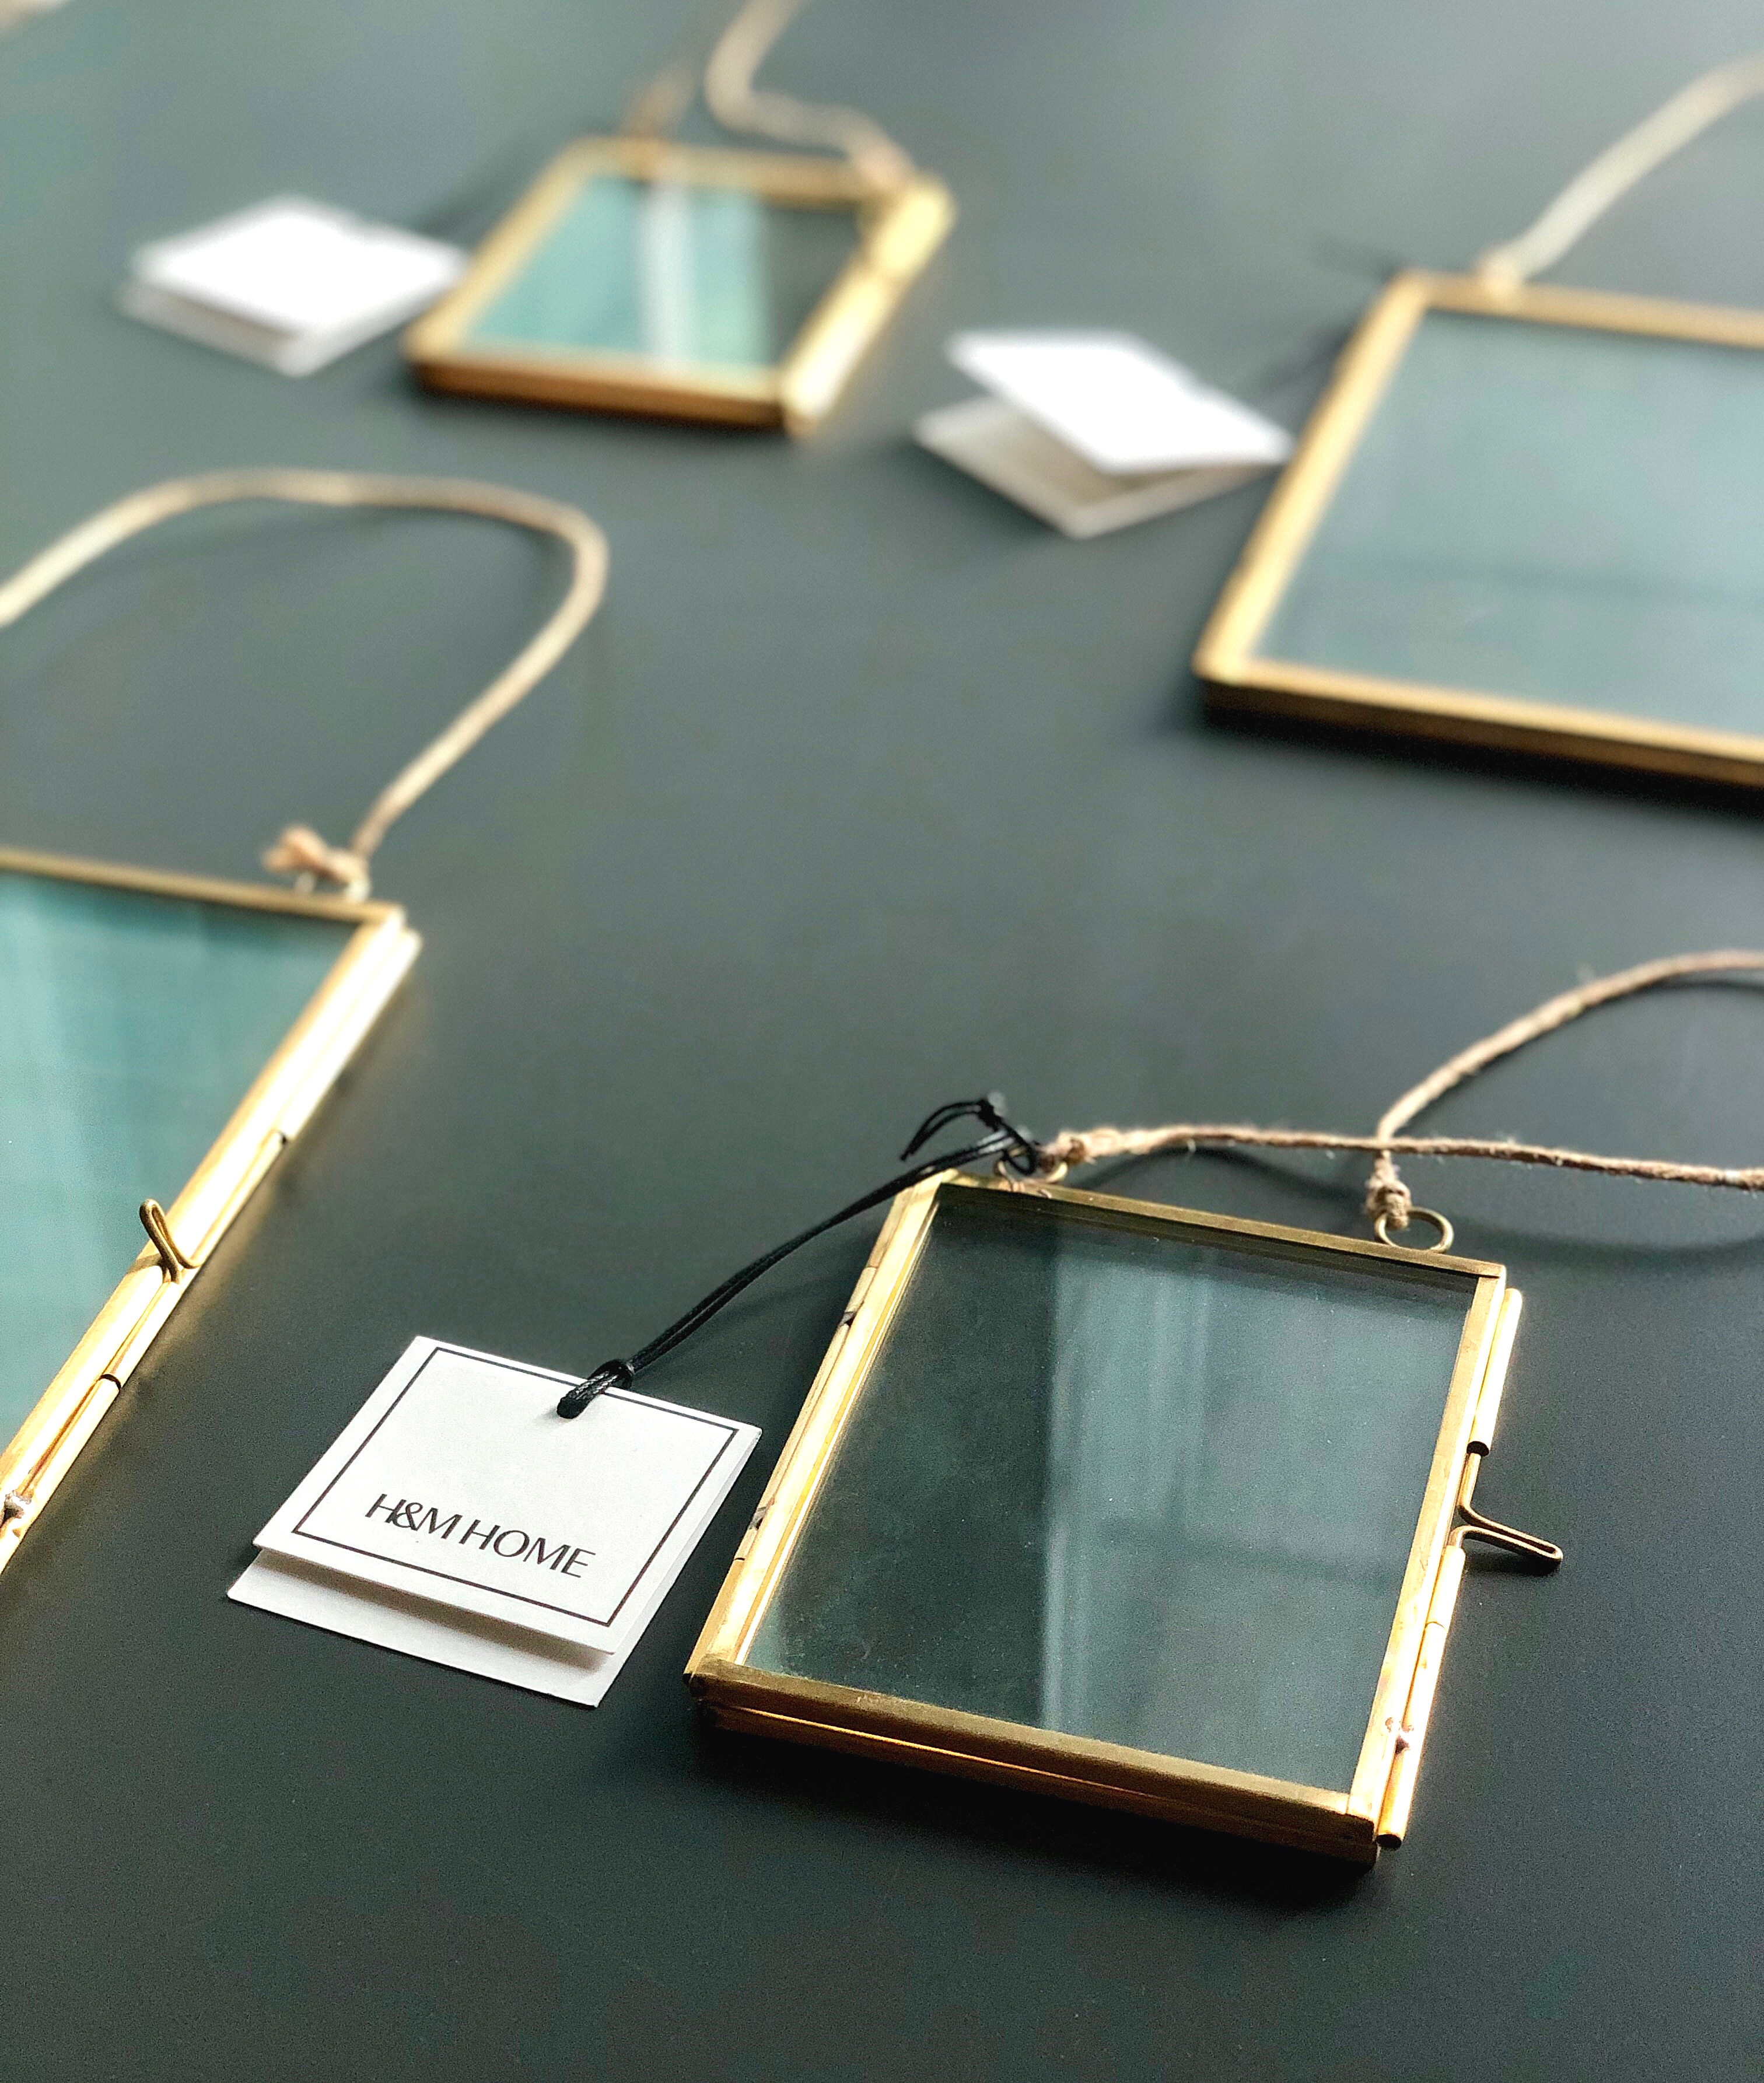
1) Choose flat frames with a blank or floating background. I ordered these metal frames from H&M Home.
2) Carefully remove your pressed flowers from the parchment paper, and arrange them on the frame to the positioning you like. Once you’re happy with how your flowers are displayed, remove them off your frame and wipe the frame clean to remove any finger prints or specks of dust.
3) With a glue gun, add a tiny dot of glue on the back of your flowers and press carefully on the inside part of the back frame, in the positioning you want.
4) Wait until cool/dry (2-3 minutes). Wipe the frame again if needed and lock your frame shut.

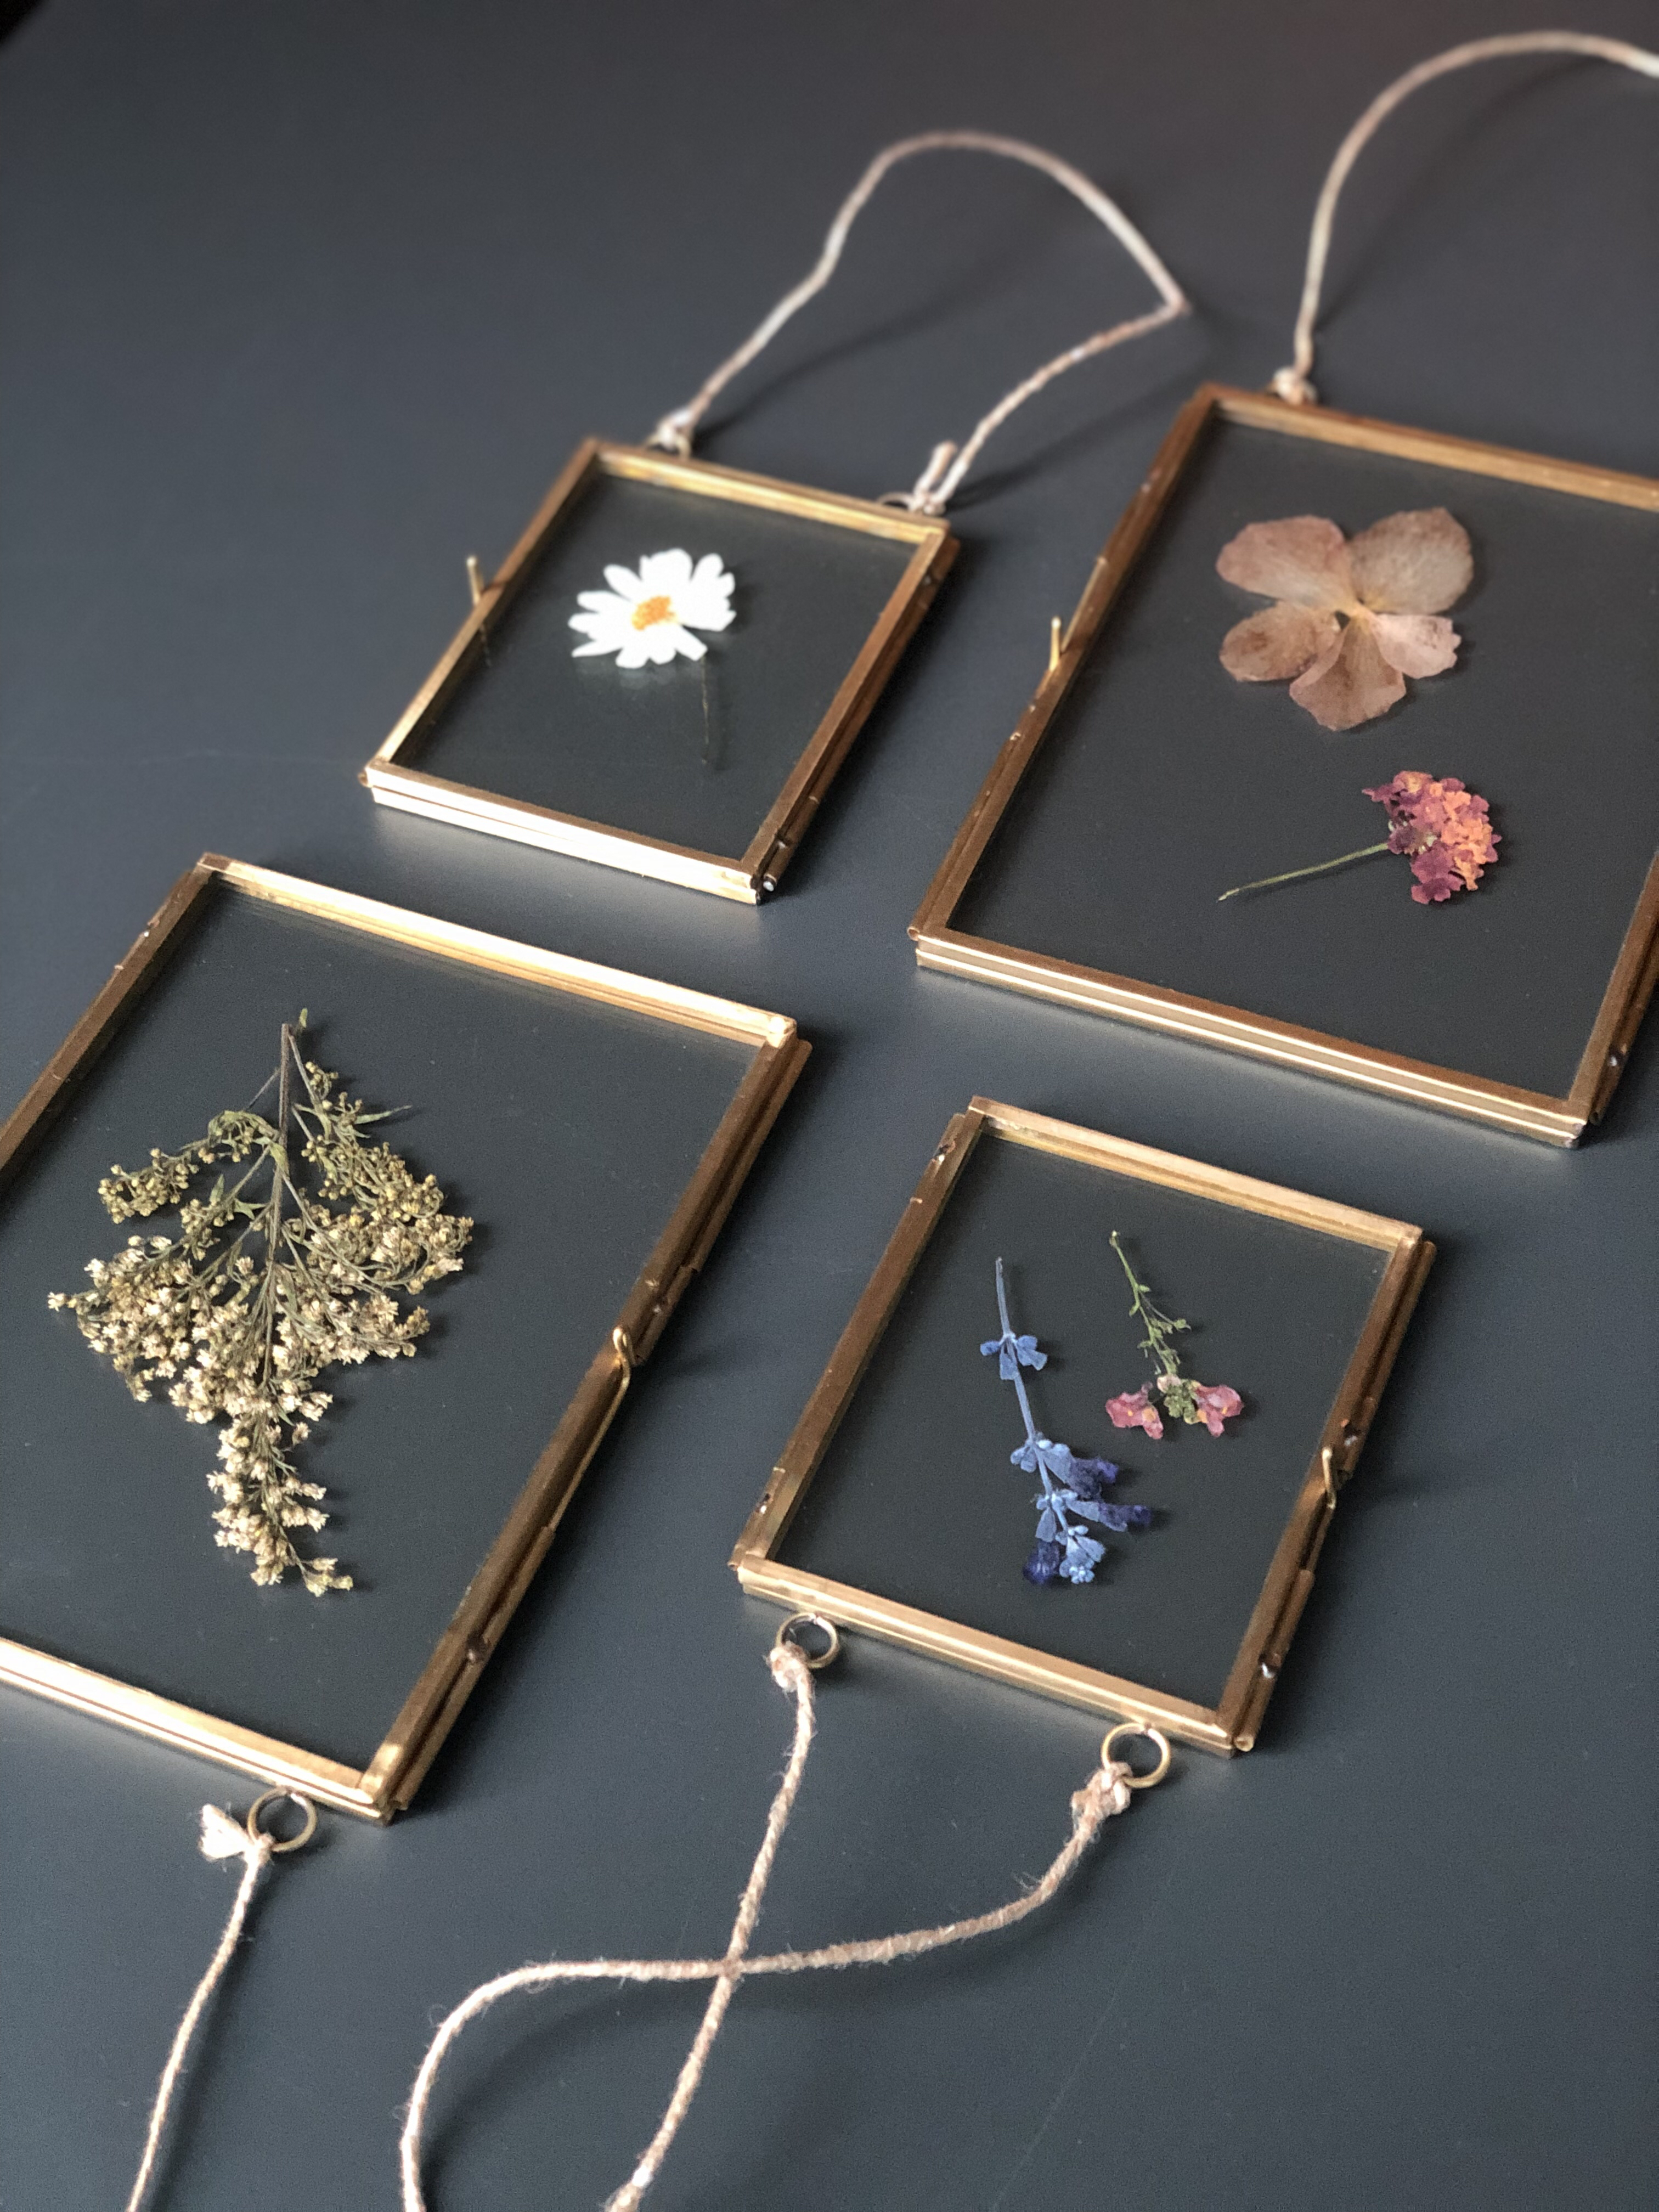
It’s pretty incredible to see how the flowers will turn out, especially with colour. Some colours maintained while others faded, or even changed completely. For the frame below, I thought the natural ombré effect of the purple flower turned out pretty cool.

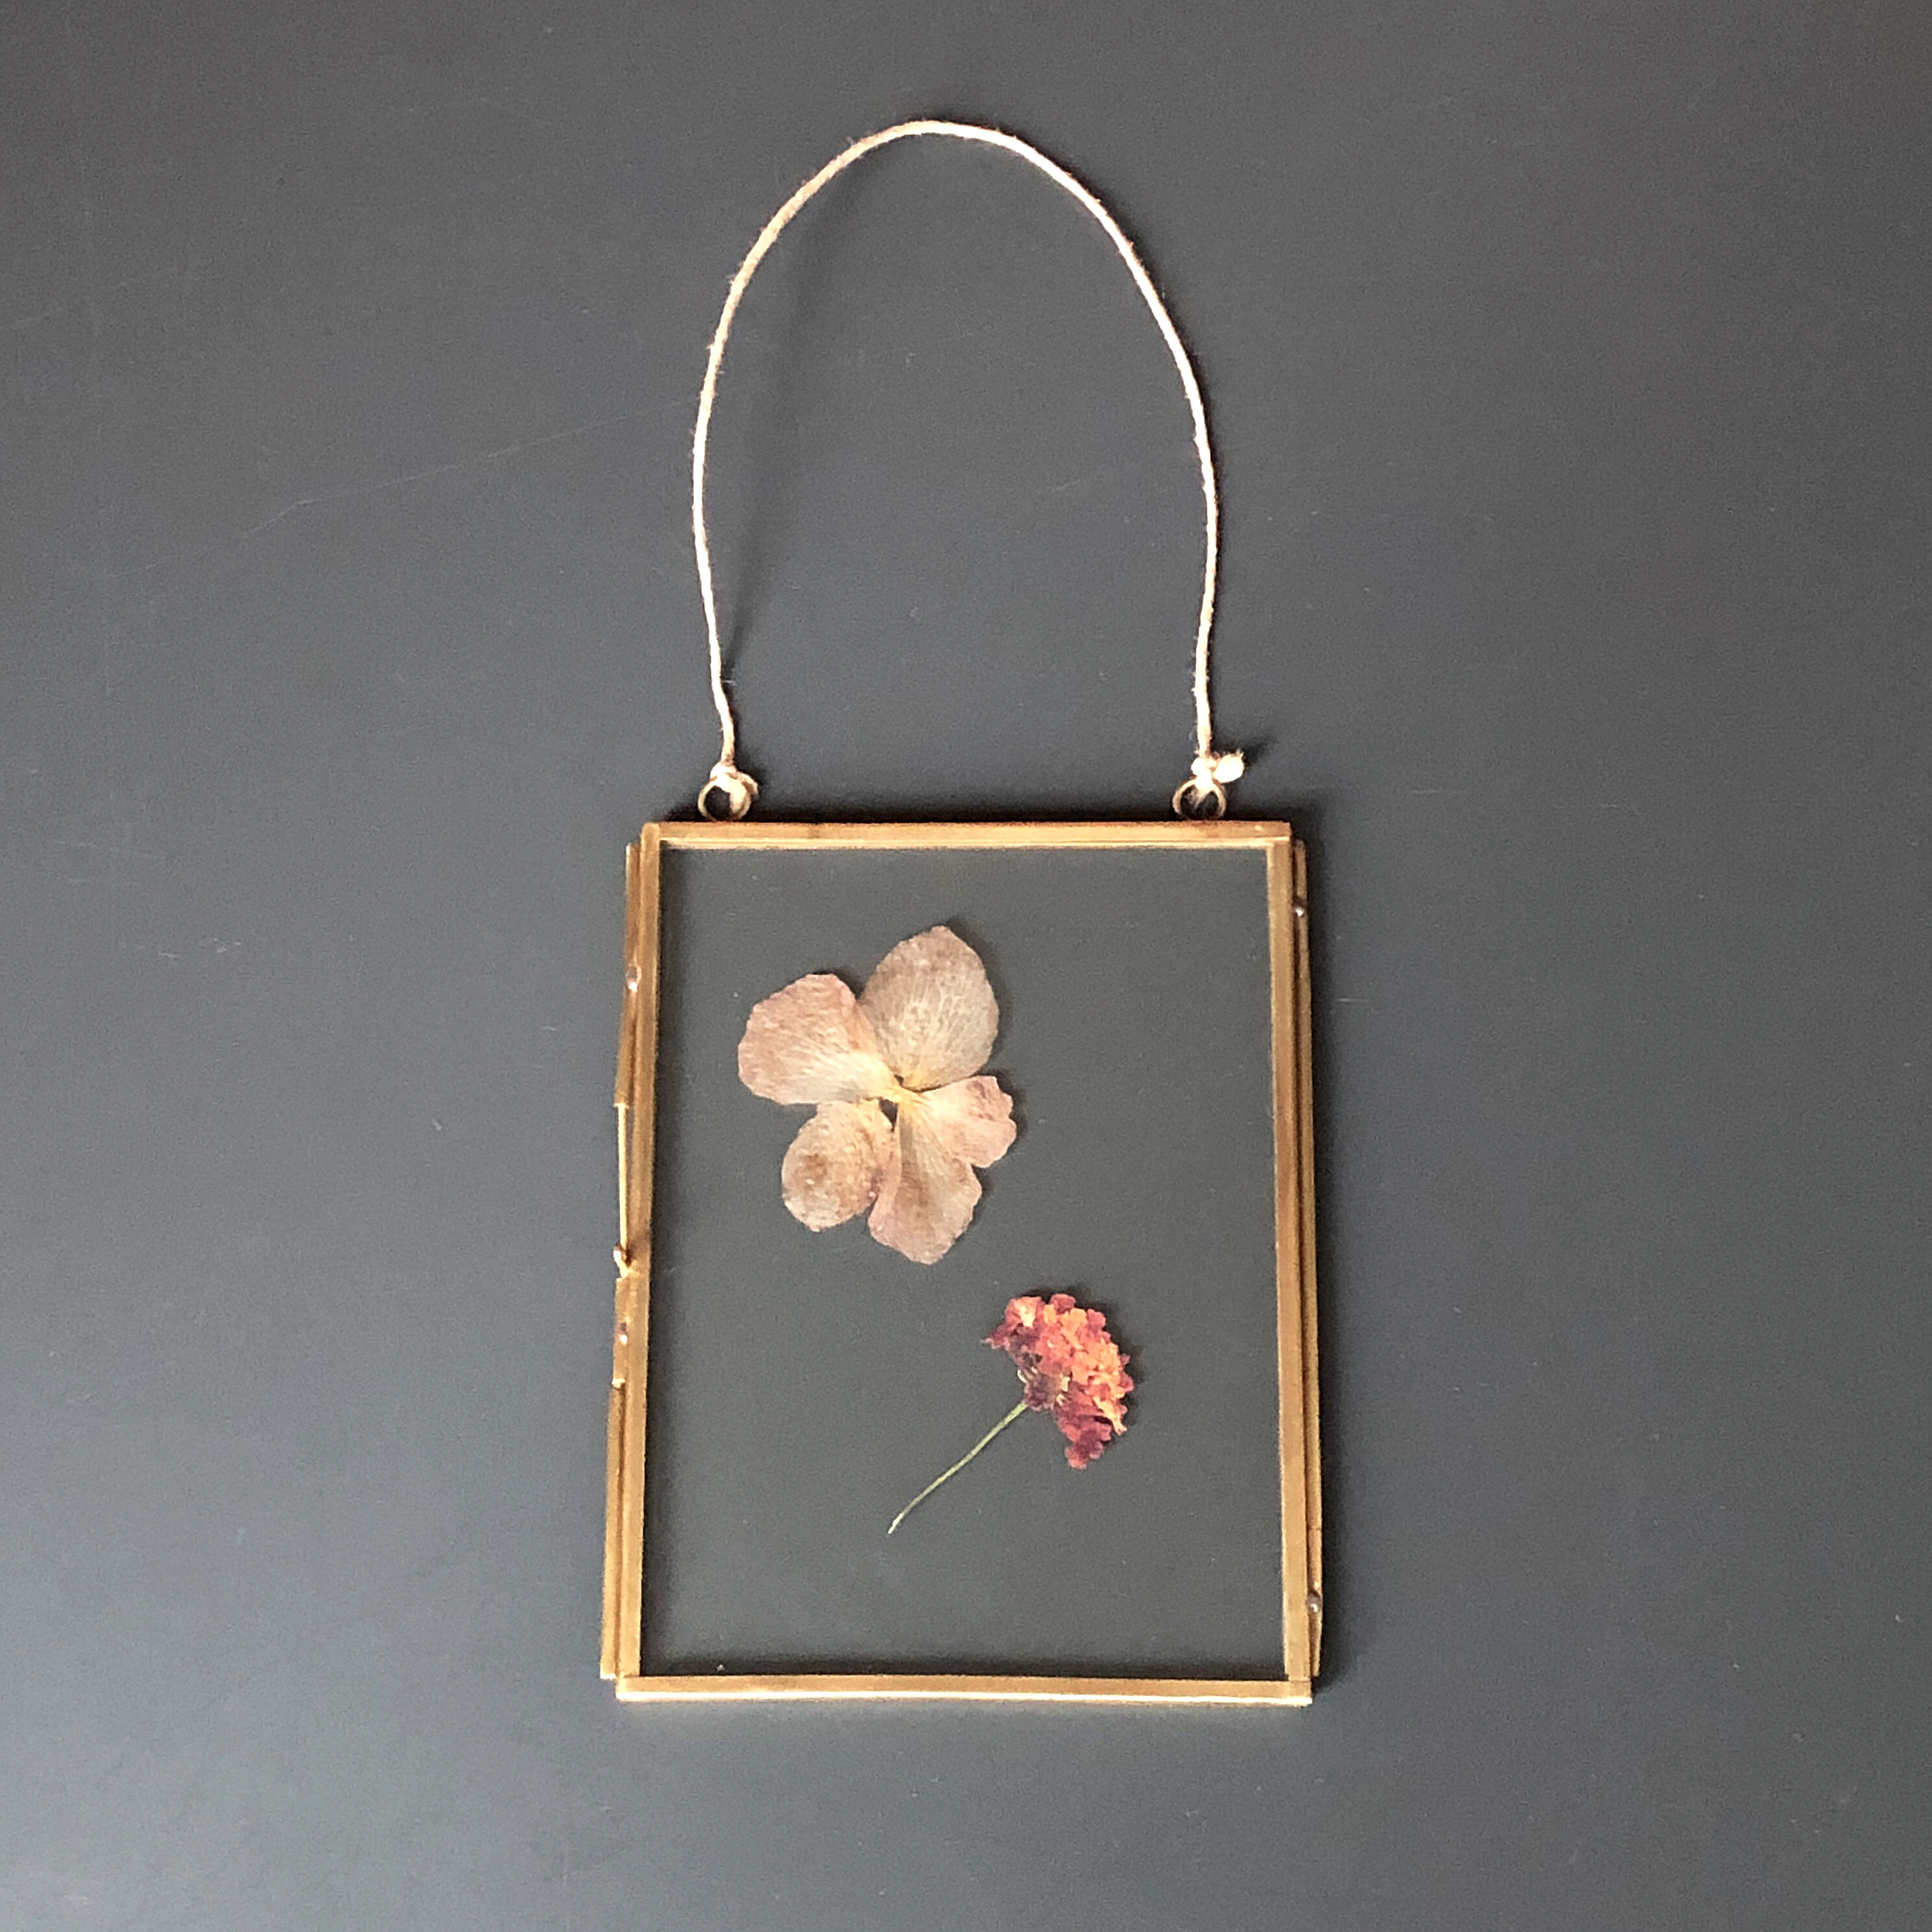
The biggest surprise for me was in the frame below. That five-petal “pink” flower on the top left corner used to be a bright red! So it’s funny to me how some flowers remained as intact as possible while others totally transformed in the pressing and drying process. Regardless, they came out beautiful on their own.
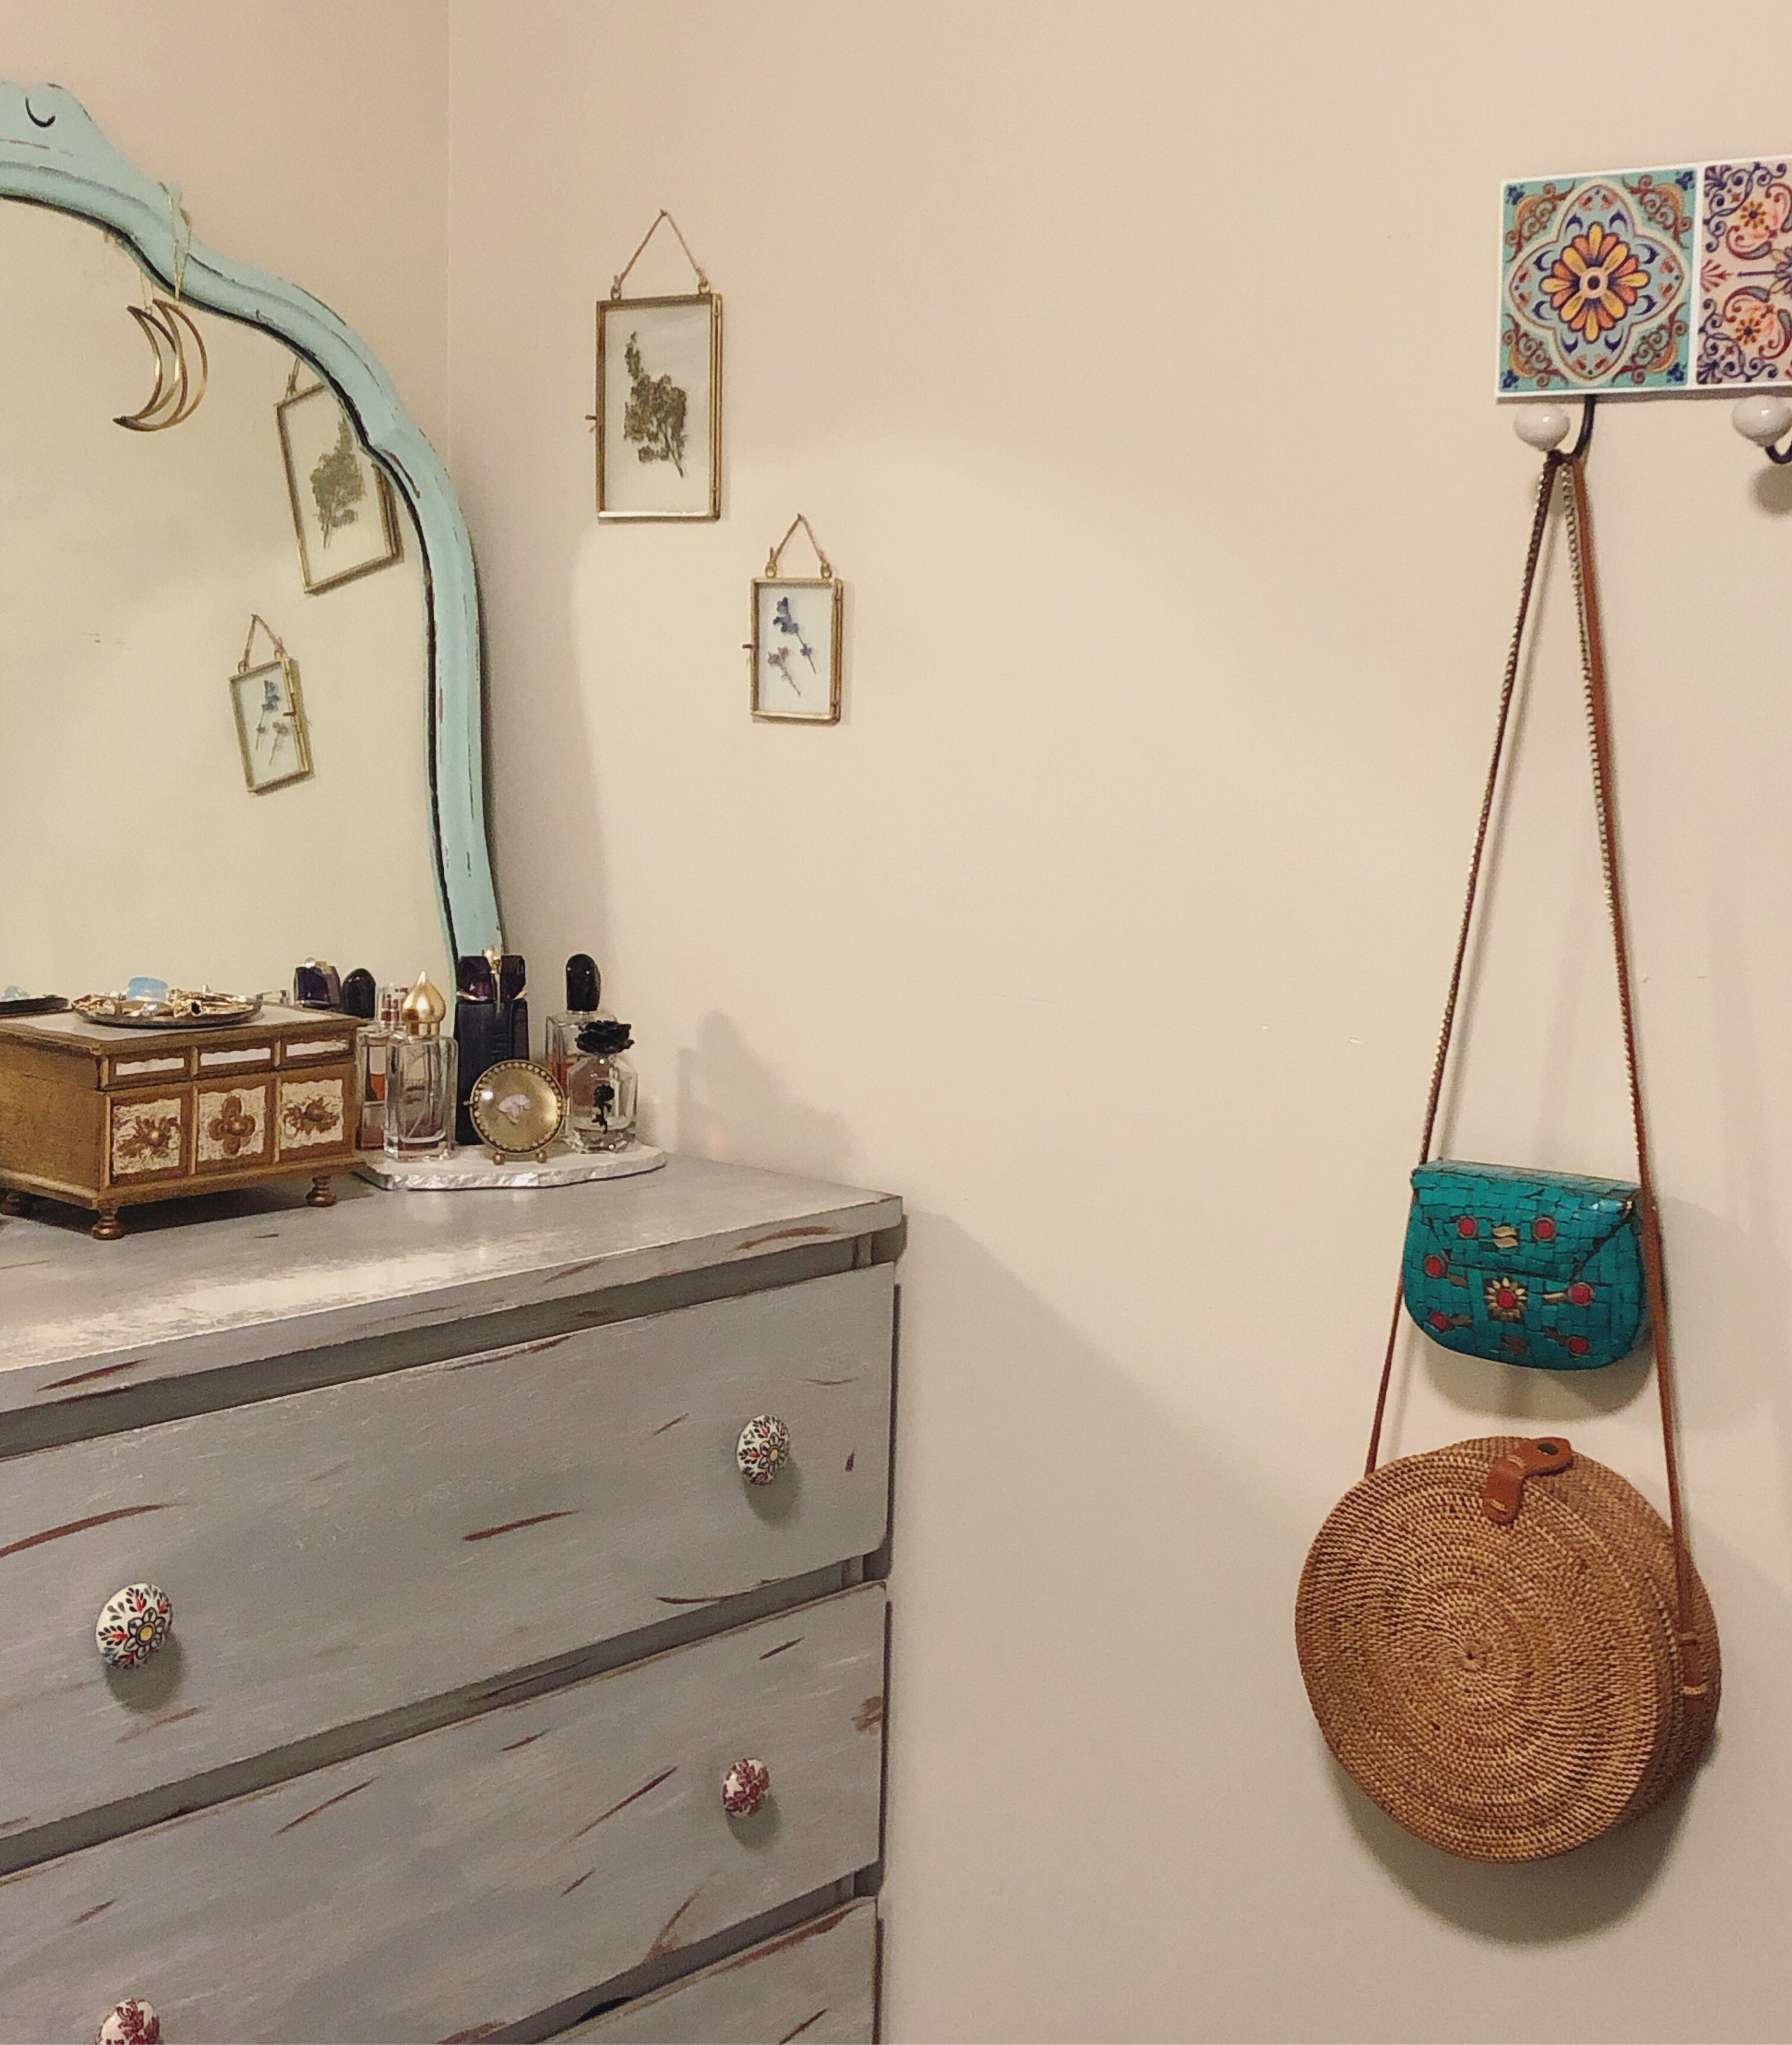
After this experiment, I’m motivated to try this out with other types of flowers, and with the upcoming fall season, would love to try it with foliage leaves. For now though, I’m incredibly pleased with how this worked out on the first try, and happy that how a trip to a store pushed me to re-create something on my own. This came at a good time because, as it’s September 1st, I feel it’s a good date to officially wrap up Summer by hanging some of its preserved beauty. Until next summer.


Leave a Reply